
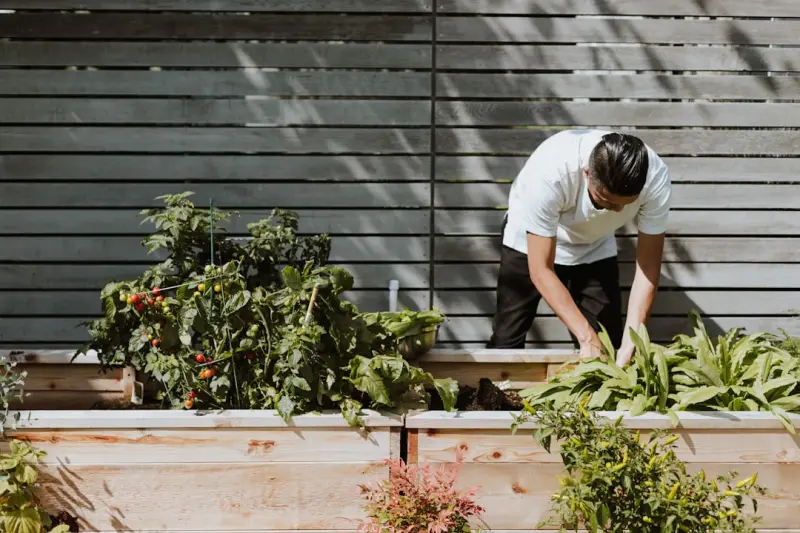
Elevating Small‑Space Living: The Art and Science of Vertical Edible Gardens
When I first moved into a studio apartment in the heart of the city, the idea of growing my own food felt like a distant dream. No backyard, limited floor space, and a balcony that could barely hold a potted plant. Yet, the desire to nurture living things and harvest fresh flavors never left me. Over the past few months, I’ve turned that longing into a thriving vertical garden that not only feeds my kitchen but also reshapes the way I experience my home.
Vertical edible gardens—sometimes called “living walls,” “plant walls,” or “vertical farms” when they go high‑tech—are more than a design fad. They are a pragmatic response to dense urban living, a sustainable food source, and a therapeutic ritual that anchors the chaos of city life. Below, I’ll walk you through the philosophy, the practical steps, and the unexpected benefits that have transformed my modest nook into a green, productive sanctuary.
The Why: Rethinking Space, Nutrition, and Well‑Being
Space maximization. Traditional garden beds demand horizontal real estate. A vertical system flips that script, allowing you to stack layers of planting pockets on walls, railings, or freestanding frames. In a studio where every square foot counts, a wall can become a multi‑tiered harvest zone without sacrificing floor area.
Year‑round nutrition. By selecting a mix of cool‑season herbs (like cilantro and parsley) and warm‑season vegetables (such as cherry tomatoes and peppers), you can stagger planting cycles and enjoy fresh produce throughout the year. The micro‑climates you create on each tier—some receiving more light, others more shade—let you fine‑tune growing conditions for each species.
Psychological uplift. Watching seedlings push through their substrate, feeling soil between your fingers, and harvesting a crisp lettuce leaf at dinner time create a loop of accomplishment and calm. The greenery also improves indoor air quality and introduces a subtle, natural aesthetic that counters the sterile feel of many modern apartments.
Choosing the Right System for Your Home
Vertical gardens come in a spectrum from DIY DIY‑style pallet setups to sleek, modular panels with built‑in irrigation. Here’s how I evaluated my options:
- Structural support. Identify a wall that can bear weight. Drywall alone often needs reinforcement—consider wooden studs, metal brackets, or a freestanding frame.
- Light availability. South‑facing windows provide the most natural light, but most apartments also have east or west exposures that work for shade‑tolerant greens. If natural light is limited, plan for supplemental LED grow lights.
- Water management. A drip‑irrigation system or a simple self‑watering reservoir can keep the garden hydrated without constant hand‑watering. Look for setups that recycle runoff to avoid water damage.
- Modularity. Choose panels that can be added or removed as your plant collection evolves. This flexibility is crucial if you anticipate moving or changing your décor.
My final choice was a modular pocket system that attaches to a reinforced wall using hidden brackets. Each pocket holds a small fabric sack filled with a lightweight growing medium, allowing me to swap out plants as seasons change.
Soil, Substrate, and Nutrient Strategies
Traditional potting soil can be heavy, which defeats the purpose of a lightweight wall. Instead, I opted for a mix of coconut coir, perlite, and a dash of composted organic matter. This blend offers excellent drainage, aeration, and a sustainable footprint.
For nutrient delivery, I started with a balanced organic fertilizer and transitioned to a data‑driven garden insight approach. While I’m not installing a full sensor array, I use a simple moisture probe that plugs into my smartphone. It alerts me when the medium dries out, preventing both over‑ and under‑watering—a subtle nod to the high‑tech side of vertical farming without overwhelming my budget.
Plant Selection: Building a Balanced Menu
Choosing plants that thrive in a vertical environment involves considering root depth, light tolerance, and growth habit. Here’s a starter lineup that performed beautifully on my 4‑ft. by 6‑ft. wall:
- Herbs: Basil, mint, oregano, and cilantro. Their shallow roots make them perfect for pocket containers.
- Leafy greens: Arugula, baby kale, and loose‑leaf lettuce. They tolerate partial shade and grow quickly, giving frequent harvests.
- Fruit‑bearing vines: Strawberries and cherry tomatoes. I trained them to climb the vertical lattice using soft ties.
- Edible flowers: Nasturtiums and violas. Not only do they add color, but they also attract beneficial insects if you have a balcony garden.
Mixing fast‑growing greens with slower‑maturing fruit ensures you always have something ready to pick while other crops mature.
Lighting Solutions: Harnessing Natural and Artificial Light
Even the sunniest balcony may not provide consistent illumination across a multi‑tiered wall. I installed a series of low‑profile LED strips with a full spectrum (4000‑6500 K) output. The lights are set on a timer that mimics sunrise and sunset, encouraging plants to follow natural photoperiods and reducing energy usage.
If your wall faces a window, you can rely on daylight for the top tiers and supplement the lower levels. The key is to avoid harsh shadows that can cause uneven growth. A simple trick is to use reflective Mylar sheets behind the panels; they bounce stray light onto the lower pockets, improving overall exposure.
Irrigation: The Gentle Art of Consistent Moisture
Over‑watering is the most common mistake for beginners. My system uses a gravity‑fed reservoir perched on the floor beneath the wall. A thin hose runs along the top of the frame, delivering water to each pocket through tiny drip emitters. Excess water collects in a tray at the bottom, where I can refill the reservoir.
This closed‑loop design reduces waste, prevents water from seeping into the wall, and creates a humid micro‑environment that many herbs love. I check the moisture level weekly; if the medium feels dry an inch below the surface, I top it up.
Maintenance Routine: Keeping the Wall Healthy and Productive
Vertical gardens demand regular attention, but the tasks are manageable with a structured routine:
- Weekly inspection. Look for yellowing leaves, pests, or clogged emitters.
- Pruning. Trim spent foliage to encourage new growth and maintain airflow.
- Harvesting. Snip herbs and greens regularly; many plants respond by producing more foliage.
- Re‑planting. As crops finish their cycle, replace them with fresh seedlings to keep the wall continuously productive.
By turning maintenance into a mindful ritual—much like a brief meditation—I’ve found that the garden becomes a calming daily checkpoint rather than a chore.
Beyond Food: Additional Benefits of a Living Wall
While the primary goal was to grow edible plants, my vertical garden has offered several secondary advantages:
- Acoustic buffering. The layers of fabric pockets and foliage dampen ambient city noise, creating a quieter indoor environment.
- Improved air quality. Plants absorb VOCs (volatile organic compounds) and release oxygen, contributing to a fresher indoor atmosphere.
- Design flexibility. By swapping out plant species, the wall can shift from a lush, green backdrop to a vibrant, flower‑filled feature, matching seasonal décor.
- Educational value. Hosting occasional dinner parties, I love showing guests how each plant grows, sharing tips, and even gifting small cuttings.
Integrating Technology Without Losing the Human Touch
Modern vertical farms often boast sophisticated sensors, AI‑driven climate control, and automated nutrient dosing. While those systems are impressive, they can feel detached from the tactile joy of gardening. I struck a balance by using a simple moisture probe—linking back to the earlier data‑driven garden insight—and a timer for the LED lights. This hybrid approach gives me the confidence of tech support without sacrificing the hands‑on connection.
For those who crave deeper integration, consider adding a low‑cost Bluetooth sensor that tracks temperature and humidity. Pair it with a free smartphone app, and you’ll receive real‑time alerts if conditions drift outside optimal ranges. It’s a gentle nudge, not a takeover.
Cost Breakdown: From Dream to Reality
Below is a rough estimate of the expenses I incurred for a 24‑panel wall (each panel about 12 × 12 inches):
- Modular pocket system: $200
- Reinforcement brackets & hardware: $80
- LED strip lights with timer: $120
- Gravity‑fed reservoir & tubing: $50
- Growing medium (coir, perlite, compost): $45
- Seeds and starter seedlings: $30
- Moisture probe: $25
Total: $550. This investment pays off quickly as you harvest fresh produce that would otherwise cost $2‑$5 per item at the grocery store.
Getting Started: A Step‑by‑Step Blueprint
- Assess your space. Choose a sturdy wall, measure dimensions, and ensure you have a nearby power outlet for lighting.
- Gather materials. Purchase a modular pocket system or build your own using recycled pallets and fabric pockets.
- Install reinforcement. Secure brackets to studs, ensuring they can hold the combined weight of the system, medium, and plants.
- Set up irrigation. Position the reservoir, lay tubing, and attach drip emitters to each pocket.
- Fill pockets. Mix coir, perlite, and compost; pack each pocket loosely to retain moisture while allowing airflow.
- Plant selections. Start with herbs and leafy greens for quick results; add fruiting vines once the system stabilizes.
- Install lighting. Attach LED strips behind the wall, set timers, and calibrate intensity based on plant needs.
- Monitor & adjust. Use a moisture probe and visual inspection to fine‑tune watering and light schedules.
- Harvest and rotate. Regularly pick produce, prune, and replace exhausted crops with new seedlings.
Following these steps, you can transform a blank wall into a productive, living piece of art within a weekend.
Future Horizons: Scaling Up and Community Sharing
Once comfortable with a single wall, many urban dwellers expand to multiple vertical installations—balcony railings, window sills, and even freestanding towers. Some neighborhoods are experimenting with shared vertical farms in communal spaces, where residents pool resources and rotate crops. Imagine a rooftop where each apartment contributes a panel, and the collective harvest feeds the entire building.
Such collaborative models echo the spirit of community gardens but adapt them to vertical, high‑density living. They also open doors for education programs, cooking workshops, and local food‑swap events—turning a personal hobby into a neighborhood asset.
Final Reflections
Vertical edible gardens have reshaped my relationship with my home. They turned a compact living area into a source of nourishment, aesthetic pleasure, and daily mindfulness. The blend of low‑tech craftsmanship and strategic use of simple data tools creates a resilient system that feeds both body and mind.
If you’re staring at a wall and wondering how to make the most of limited space, consider giving vertical gardening a try. It’s a modest investment that yields abundant returns—fresh herbs for your next stir‑fry, a splash of green that lifts your mood, and a tangible reminder that growth is always possible, even in the tightest of places.

Mei Chen is a dynamic professional who brings a unique blend of skills to Blogging Fusion. As a key contributor to the Blogging Fusion platform, she leverages her writing expertise to create engaging content that resonates with our audience.
Related Posts
Smart Water Strategies: Turn Your Garden into a Sustainable Oasis
Learn how to capture rain, use smart irrigation, and build eco‑friendly garden features that keep ... Read More
Why Garden Desks Are the Hottest Trend Transforming Home & Garden Living
Explore the rise of garden desks, their design tips, productivity gains, and community impact, all w... Read More

Edible Curb Appeal: Turn Your Front Yard into a Harvesting Showpiece
Transform your front yard into a stunning edible landscape that dazzles neighbors, supplies fresh pr... Read More
Top Posts

Why Your Next Vacation Should Be a Data‑Driven Expedition
Discover how treating travel as an experiment, using simple data tools, AI suggestions, and sustainability metrics can transform any vacation into a smarter, mo...Read More
Seasonal Scent Curation and Sustainable Garden Design: A Fresh Take on Home & Garden
Explore innovative ways to curate seasonal scents, create wildlife corridors, and use recycled materials in garden design, turning your home into a sustainable ...Read More

Turning Your Backyard into a Thriving Wildlife Corridor
Discover how to transform an ordinary backyard into a vibrant wildlife corridor, attracting pollinators, birds, and beneficial insects while improving garden he...Read More
Turning Your Backyard Into a Productive Sanctuary
Explore how a simple garden desk can revitalize your home, blend work with nature, and enhance health and productivity—all without leaving your backyard....Read More
0 Comments
Post Comment
You will need to Login or Register to comment on this post!