
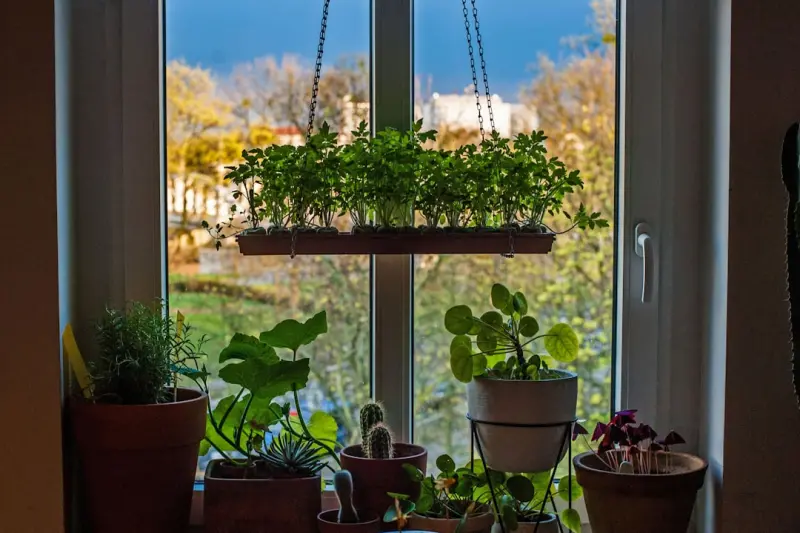
Why Smart Soil Sensors Are the Secret Sauce for Low‑Maintenance Gardens
When I first moved into my modest bungalow on the edge of town, I dreamed of a garden that would look like a polished magazine spread without demanding a second job. I was a busy professional, a dad of two, and a self‑confessed “plant‑killer” who could wilt a succulent with a single over‑watering. The idea of a thriving garden seemed as distant as a tropical vacation, but technology promised a compromise: smart soil sensors.
Fast forward a few months, and my backyard has become a quiet laboratory where data does the heavy lifting. In this post, I’ll walk you through the why, what, and how of integrating soil‑sensor technology into a garden that practically cares for itself. Whether you have a sprawling suburban plot, a compact balcony, or a community‑garden plot, the principles apply. Let’s dig in.
The Problem with Traditional Gardening
Conventional gardening relies on intuition, trial‑and‑error, and a healthy dose of guesswork. Even seasoned gardeners can misread the signs of a thirsty plant or an over‑fertilized bed. The consequences are familiar:
- Wilting leaves that bounce back only after a frantic watering session.
- Leaf scorch from too much sun, followed by an endless cycle of pruning.
- Uneven growth because soil moisture varies dramatically across a single plot.
These issues are amplified for anyone juggling work, family, and the occasional hobby. The garden becomes a source of stress rather than a sanctuary. That’s where soil‑sensor tech steps in, turning the garden into a data‑rich environment that tells you exactly what it needs—no psychic powers required.
What Are Soil Sensors, Exactly?
A soil sensor is a small, rugged device that you bury a few inches beneath the surface. It continuously measures key parameters such as:
- Moisture level – How much water is actually in the root zone.
- Temperature – Both of the soil and ambient air, influencing germination and root activity.
- pH – Determines nutrient availability for your plants.
- Electrical conductivity (EC) – A proxy for nutrient concentration.
- Light exposure – For surface‑level sensors that gauge how much sunlight a spot receives.
These metrics are transmitted via Bluetooth, Wi‑Fi, or a low‑power LoRa network to a smartphone app or a cloud dashboard. The platform then translates raw numbers into actionable advice: “Water the rosemary at 6 pm,” or “Add a teaspoon of lime this week.” Some advanced models even integrate with smart irrigation valves, automating watering based on real‑time data.
Choosing the Right Sensor for Your Space
Not all sensors are created equal, and picking the right one depends on three main factors: scale, budget, and integration needs.
- Scale – A small balcony garden may get away with a single, all‑in‑one sensor, while a larger yard benefits from a network of nodes spread across different micro‑climates.
- Budget – Entry‑level units start around $30‑$50 per sensor. Professional‑grade systems can exceed $200 per node but often include advanced analytics and API access for custom automations.
- Integration – If you already have a smart home hub (like Apple HomeKit, Google Home, or Amazon Alexa), look for sensors that speak the same language. This ensures seamless voice‑controlled irrigation or alerts.
My own setup uses a mid‑range sensor from a reputable brand that plugs into my existing smart‑home ecosystem. The initial cost was modest, and the savings on water bills and fertilizer soon paid for itself.
Installation: A Step‑by‑Step Guide
Don’t let the techy vibe intimidate you. Installing a soil sensor is as simple as planting a seed.
- Identify planting zones. Sketch a quick map of your garden, marking sun‑exposed areas, shade pockets, and high‑traffic zones.
- Prep the soil. Loosen a small trench (about 6‑8 inches deep) where each sensor will sit. This ensures good contact with the surrounding earth.
- Insert the sensor. Follow the manufacturer’s depth guidelines—most recommend placing the probe tip near the root zone of the plants you intend to monitor.
- Backfill and level. Gently pack the soil back in, avoiding compacting it too tightly, which could skew moisture readings.
- Connect to Wi‑Fi or Bluetooth. Open the companion app, pair the sensor, and assign it a name (e.g., “Herb Bed – West Corner”).
- Calibrate. Many apps ask you to perform a “dry” and “wet” calibration. Follow the prompts, and you’re good to go.
Within minutes, you’ll start receiving data points on your phone. If you’re a visual learner, most platforms let you set up graphs that show moisture trends over days, weeks, or months.
Data‑Driven Decision Making: From Insight to Action
Now that you have a steady stream of numbers, the magic begins. Let’s break down how to interpret the most common metrics.
Moisture
Most sensors report moisture as a percentage. A sweet spot for most vegetables sits between 40‑60 %. If you see consistent readings below 30 %, it’s time to water—preferably in the early morning or late afternoon to minimize evaporation.
Temperature
Soil temperature influences germination. Seeds like lettuce sprout best when the soil stays above 45 °F, while tomatoes prefer 70‑80 °F. If you notice temperature dips at night, consider mulching to retain heat.
pH
Most garden plants thrive in a pH range of 6.0‑7.0. A reading below 5.5 may signal acidity, which you can correct with lime. Conversely, a high pH (above 7.5) might need elemental sulfur.
EC (Nutrient Levels)
High EC suggests a build‑up of salts—often a result of over‑fertilizing. Reduce fertilizer applications, flush the soil with water, and monitor the EC again after a week.
These insights translate into concrete actions: adjust irrigation schedules, tweak fertilization, or add organic amendments. Over time, the garden becomes a self‑regulating system that responds to real conditions rather than your assumptions.
Integrating Sensors with Smart Irrigation
If you’re ready to take automation a step further, connect your sensors to a smart irrigation controller. Many brands support re‑watering protocols that mimic natural rainfall patterns, ensuring water is delivered in short bursts rather than long, wasteful streams.
Here’s a simple workflow:
- Set a moisture threshold (e.g., 45 %).
- When the sensor reports below this threshold, the controller activates a drip line for a preset duration (usually 5‑10 minutes).
- After watering, the sensor re‑checks moisture. If the level is still low, the system may run a second cycle after a short delay.
This feedback loop prevents both under‑ and over‑watering, conserving water and protecting the plant roots from rot. Plus, many controllers send push notifications, so you stay in the loop without obsessively checking your phone.
Benefits Beyond Convenience
Smart soil sensors do more than save time; they contribute to broader sustainability goals.
- Water Conservation. By watering only when necessary, you can cut residential water use by up to 30 % in arid climates.
- Reduced Chemical Runoff. Precise fertilizer application prevents excess nutrients from leaching into storm drains.
- Enhanced Plant Health. Consistent moisture and pH levels lead to stronger, disease‑resistant plants, which means fewer pesticide interventions.
These advantages align with the growing movement toward urban greening initiatives that view private gardens as part of a larger ecological network.
Case Study: My Family’s Herb Garden
To illustrate the impact, let me share a quick case study from my own backyard. I planted a modest herb garden featuring basil, thyme, mint, and oregano. Initially, I watered daily, only to find the basil turning yellow and the mint becoming soggy.
After installing two moisture sensors—one in the sunny western bed, another in the shaded eastern corner—the app highlighted a stark contrast: the western side stayed at 20 % moisture while the east lingered at 55 %.
Armed with this data, I set up a drip system that delivered water only to the dry western patch for 8 minutes each morning. The results were immediate: the basil perked up, and the mint regained its vigor. Over a three‑month period, my water usage dropped by roughly 25 %, and I cut fertilizer applications in half after the EC readings flagged nutrient excess.
This small experiment proved that even a modest sensor deployment can transform garden outcomes, turning guesswork into science.
Potential Pitfalls and How to Avoid Them
No technology is flawless. Here are common hiccups and practical fixes.
- Connectivity Issues. Sensors placed deep in the soil may struggle with Bluetooth signals. Solution: use a Wi‑Fi bridge or place a small repeater at the surface.
- Battery Drain. Many sensors run on replaceable batteries. Set reminders to check battery life every few months, or opt for solar‑powered models.
- Calibration Drift. Over time, sensor accuracy can shift. Perform a calibration check at the start of each growing season.
- Data Overload. The app may flood you with numbers. Focus on the three core metrics—moisture, temperature, and pH—and set custom alerts for thresholds you care about.
By anticipating these challenges, you keep the system running smoothly and maintain confidence in the data.
Future Trends: What’s Next for Smart Gardening?
The field is evolving rapidly. Upcoming innovations include:
- AI‑Powered Predictive Analytics. Platforms that forecast water needs based on weather forecasts, plant growth stages, and historical data.
- Multi‑Sensor Pods. Devices that combine soil, air, and leaf‑wetness sensors into a single, compact unit.
- Community Data Sharing. Neighborhood networks where gardeners share anonymized sensor data to map micro‑climates across a city.
- Integration with Renewable Energy. Solar‑driven irrigation pumps that respond to sensor data, creating a fully off‑grid garden ecosystem.
Keeping an eye on these trends will ensure your garden stays ahead of the curve, blending sustainability with cutting‑edge convenience.
Getting Started: My 5‑Step Action Plan
If you’re convinced (or even mildly curious), here’s a concise roadmap to launch your smart garden journey.
- Assess Your Needs. Determine the size of your garden and the plants you’ll grow. Identify any problem areas—dry spots, over‑watering zones, or pH‑sensitive beds.
- Select a Sensor Kit. Choose a brand that offers the metrics you care about and integrates with your existing smart‑home ecosystem.
- Install and Calibrate. Follow the simple steps outlined earlier, and run a calibration cycle before the first planting season.
- Set Up Alerts. Configure notifications for moisture drops, temperature spikes, or pH imbalances. Keep thresholds realistic to avoid alert fatigue.
- Iterate. Review the data weekly, adjust watering schedules, and experiment with mulches or shade cloths based on insights.
Within a couple of weeks, you’ll notice a shift from reactive gardening to proactive stewardship—a subtle but powerful transformation.
Conclusion: Embrace the Data, Nurture the Soul
Smart soil sensors are more than gadgets; they’re allies that let you honor the natural rhythms of plants while fitting gardening into a busy modern life. By harnessing real‑time data, you reduce waste, boost plant health, and free up mental bandwidth for the things you love—like sipping coffee on a sun‑dappled patio while your garden thrives on autopilot.
So next time you stare at a wilted leaf and wonder, “Did I forget to water?” let the sensor answer for you. The garden will thank you, your water bill will smile, and you’ll finally have the low‑maintenance oasis you always imagined.

David Moore is a freelance writer specializing in two dynamic and ever-evolving fields: gambling and the tech industry. With a keen eye for detail and a knack for unraveling complex topics, David delivers insightful and engaging content that keeps readers informed and entertained.
Related Posts
Why My Garden Desk Is the Hottest Home & Garden Trend of 2024
Rose DesRochers shares her journey turning a backyard patch into a productive garden desk, revealing... Read More

Balcony to Biosphere: Crafting a Miniature Urban Forest
Turn your narrow balcony into a vibrant, eco‑friendly forest using layered planting, smart lightin... Read More
Illuminating Your Garden: The Power of Smart Outdoor Lighting
Explore the art of garden illumination with practical lighting zones, smart tech, and design inspira... Read More
Top Posts
Chasing the Uncharted Railway: A Journey Through Forgotten Tracks
A traveler uncovers the charm of obscure train lines, sharing stories of spontaneous connections, historic echoes, and the art of minimalist adventure....Read More

Micro‑Movements: Tiny Twitches That Supercharge Your Immune System
Learn the power of tiny, intentional movements that act like a low‑dose vaccine for your immune system, fitting seamlessly into your daily routine....Read More

AI‑Powered Narrative Engineering: Crafting Compelling Brand Stories at Scale
AI‑powered narrative engineering turns raw data into cohesive, emotionally resonant brand stories at scale, blending machine efficiency with human creativity ...Read More

Cultivating Mental Hygiene: A Daily Routine for Clearer Thinking
Discover a practical mental hygiene routine—quick sweeps, brain dumps, and micro‑pauses—that helps clear mental clutter, enhance focus, and foster emotion...Read More
0 Comments
Post Comment
You will need to Login or Register to comment on this post!