
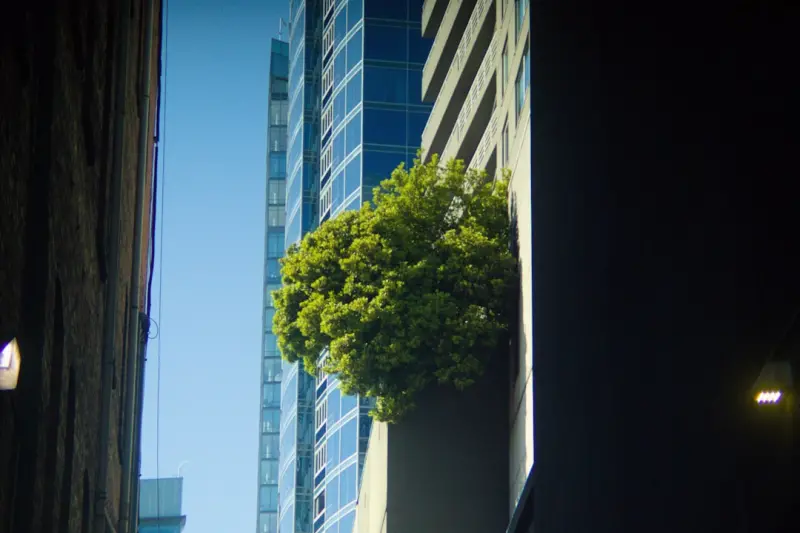
Elevating Urban Living: How to Build a Vertical Garden with Reclaimed Materials
When I first moved into a third‑floor walk‑up in the heart of the city, the only green I could claim was a wilted pothos on the windowsill. The balcony was a narrow slab of concrete, and the building regulations practically said, “No plants allowed beyond the potted herb you can fit on a kitchen counter.” Yet, the yearning for a slice of nature persisted. I discovered that the solution wasn’t more square footage—it was smarter, vertical, and often built from things we already toss out.
In this post, I’ll walk you through the philosophy, the practical steps, and the surprising benefits of creating a vertical garden using reclaimed materials. Whether you’re a renter with limited floor space, a homeowner looking to add curb appeal, or a DIY enthusiast craving a sustainable project, the approach outlined here will help you grow a lush, living wall that feels like an extension of your own personality.
Why Go Vertical? The Hidden Upsides
Space efficiency. Traditional garden beds demand horizontal space, which is a scarce commodity in dense cities. By moving upward, you free the ground for other uses—be it a seating area, a bike rack, or simply more room to breathe.
Micro‑climate control. A vertical garden can act as a natural insulator. Plants on the south‑facing wall shade the interior during hot afternoons, while the same foliage traps heat on colder days, reducing the need for heating and cooling.
Air purification. Each leaf contributes to the removal of volatile organic compounds (VOCs) from indoor air, which can improve overall indoor air quality—a subtle but powerful boost to wellbeing.
Psychological uplift. There’s an undeniable mood‑lifting effect to seeing greenery thriving in unexpected places. It reminds you that growth is possible even in constrained environments.
Before you dive in, you might wonder how this project fits into the broader narrative of wellbeing and productivity. For a fresh perspective on how movement and environment intersect, check out this piece on community walking for remote well‑being. The same principles of intentional design that improve physical health can also transform your home environment.
Choosing the Right Reclaimed Materials
Reclaimed doesn't have to mean “old and ugly.” The charm of a vertical garden lies in the contrast between rugged, repurposed structures and the delicate foliage they support. Here are a few tried‑and‑tested options:
- Pallets. Pallets are ubiquitous, inexpensive, and already pre‑finished in many cases. Look for heat‑treated pallets (marked “HT”) to avoid chemical contamination.
- Old wooden ladders. A sturdy ladder can serve as a natural tiered framework, with each rung becoming a planting shelf.
- Industrial pipe and fittings. Galvanized steel pipes can be arranged in geometric patterns, offering a modern, industrial aesthetic.
- Vintage window frames. Repurposed windows not only provide a charming backdrop but also double as mini‑greenhouses for delicate herbs.
- Discarded bookshelves. A wooden bookshelf, stripped of its paint, becomes an instant vertical planter with built‑in compartments.
When selecting reclaimed items, inspect for rot, rust, or sharp edges. Sand any rough spots, treat the wood with a low‑VOC sealant if you’re concerned about chemicals, and ensure that the final structure can bear the weight of soil and water.
Designing Your Green Wall: Layout & Plant Selection
Design is where creativity meets practicality. Follow these three pillars to craft a garden that looks intentional and thrives long term.
1. Light Mapping
Start by observing the light pattern on the intended wall. Use a simple smartphone app or a piece of paper to track sunlight hours. This will dictate the plant zones:
- Full sun (6+ hours). Ideal for herbs like rosemary, thyme, and basil, as well as sun‑loving flowers such as marigolds and nasturtiums.
- Partial shade (3‑6 hours). Good for leafy greens—spinach, kale, and Swiss chard.
- Low light (under 3 hours). Choose ferns, pothos, and ZZ plants that tolerate dimmer conditions.
2. Soil & Watering System
Because vertical gardens rely on gravity, a well‑designed watering system is crucial. There are three primary options:
- Self‑watering pockets. Use pre‑filled felt pockets that draw water upward via capillary action. They’re low‑maintenance and perfect for beginners.
- Drip irrigation. Connect a small pump to a timer, running tubes along the back of the frame. This method offers precise control over moisture levels.
- Manual watering. A simple watering can works for small setups, but you’ll need to stay vigilant to avoid dry spots.
Whichever method you choose, a lightweight potting mix—often a blend of coconut coir, perlite, and a hint of compost—keeps the overall weight manageable.
3. Plant Palette & Aesthetic Cohesion
Think of your vertical garden as a living piece of art. Choose a color scheme (monochrome greens, vibrant reds, or a mix of pastels) and vary the leaf textures—broad, glossy leaves juxtaposed with feathery ferns—to create visual interest.
Here’s a sample planting plan for a 6‑foot high, 3‑foot wide wall:
- Top tier (full sun). Basil, oregano, and dwarf cherry tomatoes in decorative ceramic pots.
- Middle tier (partial shade). Lettuce mix, kale, and edible flowers (like calendula).
- Bottom tier (low light). Pothos, English ivy, and small fern varieties.
Step‑by‑Step Build Guide
Now that you have your materials and design blueprint, let’s get hands‑on.
- Measure and mark. Determine the exact dimensions of your wall and mark the anchor points. If you’re on a rental property, use removable adhesive strips or tension rods to avoid drilling.
- Prepare the frame. Sand reclaimed wood, treat any exposed metal to prevent rust, and assemble the structure using stainless steel screws or brackets. Ensure each level is level (literally) to avoid water pooling.
- Install the watering system. Lay down a waterproof liner (plastic sheeting) behind the frame to catch any overflow. Run drip tubing from the top, securing it with zip ties, and attach a small pump if you’re automating.
- Add planting media. Fill each pocket or container with the lightweight potting mix, leaving about an inch from the top to prevent spillage.
- Plant! Gently remove seedlings from their original containers, tease roots if necessary, and place them into the vertical planters. Water lightly to settle the soil.
- Secure and test. Double‑check that the frame is firmly attached and that water flows evenly. Adjust the drip emitters as needed to ensure each tier receives appropriate moisture.
- Finishing touches. Add decorative elements—reclaimed copper pipe fittings, vintage garden tools, or small LED grow lights for low‑light areas—to personalize the space.
Maintenance Made Easy
Vertical gardens require regular but manageable care. Follow this routine:
- Weekly inspection. Look for signs of over‑watering (yellowing leaves) or under‑watering (wilting). Adjust drip timing accordingly.
- Pruning. Trim dead foliage to encourage new growth and maintain airflow, which helps prevent mold.
- Feeding. Use a balanced, water‑soluble fertilizer every 4‑6 weeks. For edible plants, opt for organic options to keep produce safe.
- Seasonal rotation. Swap out heat‑loving herbs for cool‑season greens as the climate changes. This keeps the garden productive year‑round.
If you’re curious about broader home‑wellness connections, our guide on simple home tweaks offers complementary tips on lighting and scent that can amplify the calming effect of your new green wall.
Beyond Aesthetics: Community and Sustainability Impact
Vertical gardens are more than a personal project; they can spark neighborhood conversations about sustainability. Consider these community‑focused extensions:
- Shared planting days. Invite neighbors to a weekend planting session. This fosters connection and spreads knowledge about low‑impact gardening.
- Seed swaps. Exchange heirloom seeds with fellow urban gardeners, preserving biodiversity and encouraging culinary experimentation.
- Educational signage. Add small QR codes next to each plant that link to care instructions, turning your wall into an interactive learning station for kids and visitors.
Cost Breakdown: Doing It on a Budget
One of the biggest myths about vertical gardens is that they’re expensive. Here’s a rough estimate for a modest 3‑foot by 6‑foot wall using reclaimed pallets and a simple drip system:
| Item | Estimated Cost |
|---|---|
| Reclaimed pallets (2) | $0 (found for free) |
| Stainless steel brackets & screws | $15 |
| Drip tubing & pump | $30 |
| Lightweight potting mix (5 gal) | $20 |
| Plants (seedlings) | $25 |
| Waterproof liner | $10 |
| Finishing touches (LED lights, decorative hardware) | $20 |
| Total | $120 |
Most of the cost comes from the irrigation hardware; if you opt for a manual watering approach, you can slash that portion entirely.
Future‑Proofing: Integrating Smart Tech
Even if you start simple, the vertical garden can evolve. Here are a few smart upgrades you can add later:
- Moisture sensors. Connect to a Wi‑Fi hub that alerts your phone when a tier is drying out.
- Automated timers. Pair with voice assistants (Alexa, Google Home) to start watering on command.
- Solar panels. Small flexible panels can power LED grow lights, making the system off‑grid.
These enhancements not only reduce the maintenance burden but also align the garden with the growing trend of smart home integration.
Wrapping Up: Your Green Wall, Your Signature
Building a vertical garden from reclaimed materials is a rewarding blend of sustainability, design, and personal expression. It turns a blank wall into a living showcase that improves air quality, reduces energy costs, and offers fresh herbs for your kitchen. Most importantly, it proves that even in the smallest of urban spaces, nature can find a foothold—and you can be the one to nurture it.
So, grab that old pallet from the dumpster, dust off the ladder in the garage, and start planting. Your city‑side oasis is waiting, and the only limit is how high you’re willing to grow.

David Moore is a freelance writer specializing in two dynamic and ever-evolving fields: gambling and the tech industry. With a keen eye for detail and a knack for unraveling complex topics, David delivers insightful and engaging content that keeps readers informed and entertained.
Related Posts

Garden Desks: How Outdoor Workspaces Are Redefining Home & Garden Living
A personal journey reveals how turning a backyard into a garden desk can boost focus, reduce stress,... Read More
Cultivating Productivity: Rose DesRochers’ Guide to the Garden Desk Revolution
Rose DesRochers shares her personal journey, design tips, and future trends for garden desks, showin... Read More
Garden Desk Revolution: How Outdoor Workspaces Are Redefining Home Life
Explore the garden desk trend that merges work and well‑being, turning patios into productive, hea... Read More
Top Posts

Designing a Personal Learning Roadmap to Accelerate Your Career
A step‑by‑step guide to building a personal learning roadmap that aligns with business priorities, leverages micro‑internships, and negotiates dedicated d...Read More
The Hidden Power of Everyday Home Tweaks: Boost Comfort, Save Money, and Feel More Alive
Small, intentional adjustments—like optimizing light, sealing drafts, adding greenery, and creating micro‑digital‑free zones—can dramatically improve co...Read More
Why Garden Desks Are Redefining Modern Employment
Explore the rise of garden desks as the secret weapon reshaping employment, blending nature with productivity for thriving remote work....Read More

Zero‑Tech Escapes: Redefining Luxury Travel in the Age of Constant Connection
Explore the art of traveling without screens, from minimalist packing to micro‑adventures, and learn how unplugging can transform luxury travel into a profoun...Read More
0 Comments
Post Comment
You will need to Login or Register to comment on this post!