
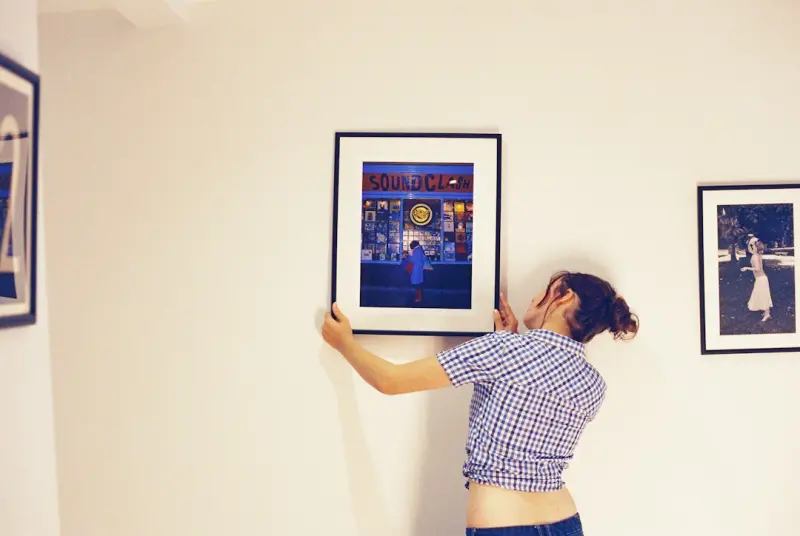
Curating a Rotating Home Gallery: Fresh Looks Without the Clutter
Ever walk into a room and feel the walls sigh with boredom? I’ve been there—standing in my own living room, eye‑rolling at the same framed print that has become a permanent fixture for years. As a lifelong collector of curiosities and a self‑declared “home‑stylist in training,” I discovered that the secret to a vibrant living space isn’t buying more décor; it’s learning how to let what you already own breathe, change, and surprise you. This guide walks you through a playful, budget‑friendly system for turning every wall into a rotating gallery, so your home feels freshly curated day after day.
Why Rotate? The Psychology of Freshness
Our brains are wired to seek novelty. Even subtle shifts in visual scenery can reset our mood, spark creativity, and reduce the mental fatigue that builds when we stare at the same backdrop for months. A rotating gallery gives you a low‑effort way to tap into that novelty effect without the chaos of a full‑blown redesign. Think of it as a “visual espresso shot” for your home: quick, invigorating, and surprisingly restorative.
Step 1: Audit Your Existing Collection
Before you start swapping frames, take a measured inventory. Pull every piece of wall art, photograph, and decorative object you own and lay them on a clean surface. Ask yourself three simple questions for each item:
- Emotional resonance: Does this piece still make me feel something?
- Visual compatibility: Does it complement my current color palette and style?
- Frequency of use: How often have I displayed it in the past year?
Set aside items that score low on all three—these are prime candidates for donation, resale, or storage.
Step 2: Create a “Theme Calendar”
Instead of random swaps, give yourself a loose thematic guide. Themes can be as broad as “Coastal Calm” or as specific as “Mid‑Century Modern Accents.” The goal is to create a sense of continuity that still allows for variation. Here are a few starter ideas:
- Seasonal Hues: Warm oranges and reds for autumn; cool blues and whites for winter.
- Travel Memories: Rotate photographs from recent trips, each month showcasing a different destination.
- Artistic Mediums: One month focus on watercolor prints, the next on black‑and‑white photography.
Write your themes on a printable calendar, assigning each to a month or a quarter. When the date flips, you’ll already know which mood you’re aiming for, making the swap feel intentional rather than haphazard.
Step 3: Invest in Flexible Hanging Systems
Rigid nail‑and‑hook setups make swapping a chore. Instead, adopt a modular hanging solution:
- Picture rails: A simple wooden rail mounted near the ceiling lets you slide frames along a wire or cord.
- Magnetic paint: Apply a thin coat of magnetic primer on a feature wall, then cover with your preferred paint shade. Small magnets hold lightweight pieces.
- Command strips: For heavier art, use damage‑free adhesive strips that can bear up to several pounds.
These systems reduce wall damage and speed up the exchange process, turning a weekly chore into a five‑minute ritual.
Step 4: Mix Media for Depth
A truly dynamic gallery isn’t just a row of framed prints. Introduce texture and dimensionality by incorporating:
- Shadow boxes: Perfect for 3‑D objects like vintage postcards, small sculptures, or pressed flowers.
- Fabric panels: Hang a woven tapestry or a framed piece of patterned fabric for a tactile element.
- LED backlighting: Subtle illumination can make a simple poster feel like a museum exhibit.
These variations keep the eye moving across the wall, preventing visual monotony.
Step 5: Leverage Digital Frames Wisely
While the focus here is on physical objects, a single high‑resolution digital frame can act as a “wildcard” in your rotation. Load it with a curated slideshow of high‑quality photos—family moments, travel snapshots, or even artwork you’ve discovered online. Because the content changes automatically, you gain the novelty factor without lifting a single frame.
For those interested in a deeper dive on how tech can harmonize with home aesthetics, check out our piece on taming tech for a healthier living space. It offers practical advice on integrating screens without sacrificing serenity.
Step 6: Embrace the “One‑In, One‑Out” Rule
To keep the collection from ballooning, adopt a simple rule: for every new item you bring in, one must leave. This practice not only curtails clutter but also forces you to be selective—an essential habit for any home that aspires to feel both curated and lived‑in.
Step 7: Seasonal Storage Solutions
When you rotate out pieces, you’ll need a home for them. Invest in clear, labeled storage bins and a dedicated closet shelf. Store items vertically on padded racks to avoid warping. Adding a scented sachet or cedar block can keep stored textiles fresh and insect‑free.
Step 8: Invite Feedback and Co‑Create
If you share your space with family, friends, or roommates, make the gallery a collaborative project. Host a quarterly “gallery walk” where everyone votes on favorite pieces or suggests new themes. This not only democratizes the décor process but also deepens the emotional connection everyone feels to the space.
Step 9: Document Your Journey
Maintain a simple visual log—a photo diary of each month’s configuration. Over time, you’ll notice patterns (perhaps you gravitate toward certain colors in winter) and can refine your theme calendar accordingly. This practice also gives you a ready‑made archive for future nostalgia trips.
Step 10: Blend Nature Without Over‑hauling
If you’ve been inspired by the concept of bringing the outdoors inside, you can subtly weave natural elements into your gallery without turning the whole room into a jungle. Simple options include:
- Framing pressed leaves alongside your art.
- Hanging a small, wall‑mounted succulent in a decorative pot.
- Adding a narrow shelf for a rotating selection of dried flower bundles.
For a more in‑depth perspective on integrating nature into interior design, see our article on natural home design. It offers a wealth of ideas for subtle, eco‑friendly touches.
Bonus: Sound‑Friendly Wall Arrangement
While rotating visual elements, consider the acoustic impact of your layout. Heavy frames and dense materials can dampen sound, while open spaces may amplify it. A balanced arrangement not only looks good but also contributes to a calmer auditory environment. For those who love to fine‑tune their home’s acoustic profile, our guide on mastering home acoustics provides practical tips that pair nicely with a rotating gallery.
Final Thoughts: Make Your Walls Work for You
Turning your walls into a rotating gallery is more than a decorative stunt; it’s a mindset shift toward mindful consumption, purposeful design, and daily inspiration. By auditing what you have, planning themes, investing in flexible hardware, and involving the people you live with, you create a living canvas that evolves with your life. The next time you walk into a room, you’ll be greeted by fresh visual energy—a subtle reminder that home, like art, is always a work in progress.

When it comes to the world of blogging and writing, Rose DesRochers is a name that stands out. Her passion for creating quality content and connecting with her audience has made her a trusted voice in the industry. Aside from her skills as a writer and blogger, Rose is also known for her compassionate nature.
Related Posts
Unlock Hidden Potential in Your Home: 7 Overlooked Spaces That Can Transform Daily Life
Explore practical, low‑budget ideas to repurpose underused areas of your home—from a hallway clo... Read More

Creating Calming Nooks: Low‑Tech Strategies for Home Focus
A practical guide to crafting low‑tech calming corners in your home, using everyday items and mind... Read More

Designing a Remote‑Work Ready Home That Fuels Focus and Well‑Being
Discover how to remodel your living space into a remote‑work ready environment with zones for focu... Read More
Top Posts
Cultivating Productivity: How My Garden Desk Transformed Home Life
A personal journey reveals how blending work with nature creates a harmonious, productive home environment—learn the design tips, tech tricks, and wellness be...Read More

The Quiet Power of Micro‑Journaling for Mental Resilience
Micro‑journaling offers a bite‑sized, habit‑forming approach to mental health, turning brief daily notes into powerful tools for stress reduction, self‑...Read More

Edible Landscaping: Turning Your Garden Into a Living Table
Learn how to design a garden that looks as stunning as it tastes, with practical tips on plant selection, seasonal care, sustainable practices, and integrating ...Read More

Light Up Your Life: Smart Lighting Secrets for a Happier Home
Smart lighting isn’t just about convenience—it shapes mood, supports wellness, and saves energy. Learn how to balance ambient, task, and accent light, integ...Read More
0 Comments
Post Comment
You will need to Login or Register to comment on this post!