
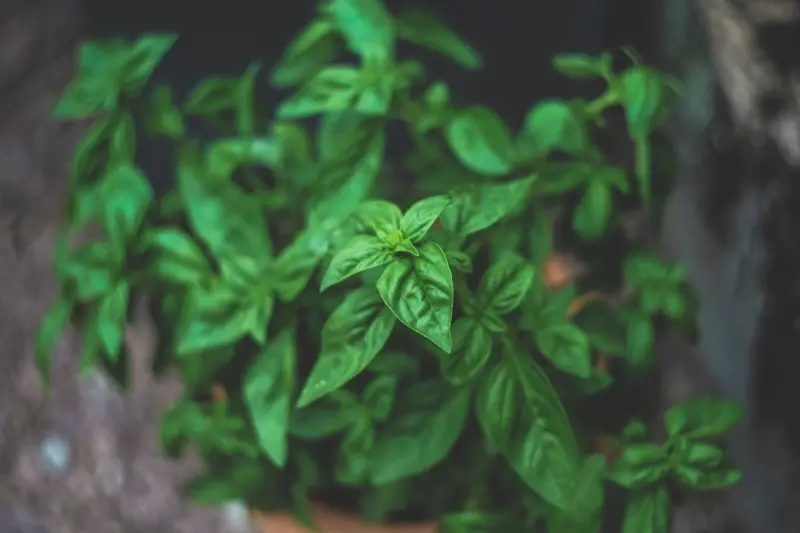
Why a Kitchen Herb Oasis Is the Secret Weapon Your Home Has Been Missing
When I first moved into my modest two‑bedroom apartment, the kitchen felt like a sterile, utilitarian box—nothing more than a place to heat leftovers and rinse dishes. I missed the earthy scent of basil, the bright pop of cilantro, and the comforting hum of a thriving garden. It wasn’t until I started experimenting with a few pots on my sunny windowsill that I realized a small herb garden could do more than just season food; it could transform the entire rhythm of my home life.
Fast forward a few seasons, and my kitchen now boasts a verdant “herb oasis” that supplies fresh flavors, natural aromatherapy, and a daily dose of mindfulness. Below, I’m sharing the step‑by‑step journey that took me from a skeptical city dweller to a proud indoor horticulturist. If you’re looking for a low‑maintenance, high‑reward project that bridges culinary creativity and home wellness, keep reading.
1. Assess Your Space—Light, Airflow, and Personality
Before you buy a single seed, take a honest inventory of your kitchen’s natural assets. Light is the most critical factor for herb success. Most culinary herbs thrive in bright, indirect sunlight—think four to six hours of filtered light a day. If you have a south‑facing window, you’re already set. If not, consider a grow‑light system; modern LED panels are affordable and can be mounted on a simple shelf.
Air circulation matters, too. Stagnant air encourages mold and can weaken fragile seedlings. A small desk fan set on low can provide gentle breezes that mimic an outdoor garden’s micro‑climate.
Finally, think about the personality you want the oasis to reflect. Do you crave a minimalist aesthetic with sleek white pots, or a bohemian vibe with mismatched ceramics? Your visual choices will influence how you interact with the space daily, turning a routine like chopping onions into a moment of calm contemplation.
2. Choose the Right Herbs for Your Kitchen
Not all herbs are created equal when it comes to indoor growing. Here’s a quick cheat‑sheet of the most forgiving varieties, along with a note on their culinary sweet spots:
- Basil – Loves warmth and plenty of light. Perfect for summer sauces, pesto, and fresh caprese.
- Parsley – Tolerates lower light levels. Ideal for garnish, tabbouleh, and brightening soups.
- Mint – Thrives in humidity but can become invasive; keep it in a separate pot. Great for teas, mojitos, and fruit salads.
- Thyme – Drought‑tolerant and compact. Superb with roasted meats and vegetables.
- Chives – Low‑maintenance and quick to regrow after trimming. Excellent for omelets, salads, and potato dishes.
- Cilantro – Prefers cooler temperatures and moderate light. Adds zing to salsas and Asian cuisines.
If you’re unsure where to start, I recommend a year‑round balcony gardening guide for inspiration on pairing herbs with companion veggies—even if your “balcony” is a windowsill.
3. Selecting Containers and Soil—The Foundations of Success
Pot choice influences drainage, root health, and overall aesthetics. Here are three container strategies that work well in most kitchens:
- Self‑watering pots: These have a water reservoir at the base, reducing the need for daily watering. Look for models with a clear water level indicator.
- Terracotta pots: Classic, breathable, and they add a rustic touch. Just remember they dry out faster, so you’ll need to water more frequently.
- Recycled glass jars: Eco‑friendly and perfect for a sleek, modern look. Drill a drainage hole in the bottom and line with a mesh to prevent soil loss.
For soil, opt for a high‑quality potting mix rather than garden soil. A blend containing peat moss, perlite, and vermiculite offers the right balance of moisture retention and aeration. I like to add a teaspoon of organic compost per pot to give my herbs an extra nutrient boost.
4. Planting Techniques—From Seed to Seedling
There are two primary approaches: starting from seed or buying established seedlings. Seeds are cheaper and give you a sense of accomplishment, but they require a bit more patience.
Seed starting basics:
- Fill a seed tray with moistened potting mix.
- Sow seeds thinly—most herb seeds are tiny; a light dusting works.
- Cover lightly with a thin layer of soil or vermiculite.
- Place the tray under a grow light or on a warm windowsill (65‑75°F).
- Keep the soil consistently moist until germination (usually 7‑14 days).
Once seedlings sprout, transplant them into your chosen containers, spacing them enough to avoid crowding. Remember to hard‑enough them by gradually exposing the seedlings to brighter light over a week, reducing the risk of shock.
5. Watering, Feeding, and Maintenance—Keeping the Oasis Thriving
Over‑watering is the most common mistake new herb growers make. The rule of thumb: water when the top inch of soil feels dry to the touch. Stick your finger in—if it’s dry, it’s time to hydrate; if it’s still moist, wait another day.
Feeding is simple. A diluted, balanced liquid fertilizer (10‑10‑10) once a month is sufficient. I prefer an organic seaweed extract because it provides micronutrients without the risk of chemical buildup.
Regular pruning not only encourages bushier growth but also ensures a constant supply of fresh leaves. Use clean scissors, and never remove more than one‑third of a plant at a time. For mint and basil, pinch the tops regularly to prevent them from flowering too early, which can make the leaves bitter.
6. Harvesting for Flavor—and for Mood
There’s a quiet joy in snipping a sprig of basil just before it hits the pan. Harvest in the morning after the dew has evaporated, when the essential oils are most concentrated. For a balanced cut, aim for the outer leaves first, allowing the inner growth to continue unimpeded.
Beyond flavor, the act of harvesting is a mindful ritual. It forces you to pause, breathe, and appreciate the life cycle happening right on your countertop. I’ve found that this small, daily interaction reduces kitchen stress and makes meal prep feel like a creative act rather than a chore.
7. Extending the Oasis—Creative Uses Beyond Cooking
While culinary use is the headline benefit, your herb garden can double as a natural air purifier and aromatherapy source. Herbs like rosemary and mint release volatile compounds that freshen indoor air, subtly combating odors from cooking or pets.
If you enjoy entertaining, consider a herb cocktail bar. Set up a small tray with sprigs of mint, basil, and thyme, and let guests garnish their drinks. It adds an interactive, Instagram‑worthy element to any gathering.
For a touch of visual drama, hang a few small glass terrariums near the sink—these can house micro‑herbs like micro‑basil or even edible flowers such as nasturtiums, which add color and peppery notes to salads.
8. Troubleshooting Common Issues
Even seasoned growers run into hiccups. Here’s a quick diagnostic guide:
- Yellowing leaves – Could indicate over‑watering, nutrient deficiency, or insufficient light. Check soil moisture and adjust lighting.
- Leaf drop – Often a response to sudden temperature changes or drafts. Keep herbs away from air vents and doors that open to the street.
- Pests (aphids, spider mites) – Treat with a gentle spray of neem oil or a solution of water and a few drops of dish soap. Always test on a few leaves first.
- Leggy growth – Means the plant is reaching for more light. Move the pot closer to the window or increase grow‑light duration.
Remember, every problem is an opportunity to learn more about the specific needs of each herb. Keep a small notebook of observations; over time you’ll develop a sixth sense for your oasis’s health.
9. Integrating the Oasis Into Your Home’s Design Narrative
For those who value cohesive interior design, the herb oasis can become a focal point that ties together kitchen décor, dining ambience, and even entryway aesthetics. A sleek, wall‑mounted planter can double as a decorative art piece while keeping herbs within arm’s reach.
If you’re interested in how design can elevate functionality, you might explore functional entryway ideas that incorporate greenery right at the threshold, extending the garden vibe throughout your home.
Choosing containers that echo other materials in your kitchen—like brushed copper, matte black, or reclaimed wood—creates visual harmony. Pairing herbs with complementary textures (e.g., a linen kitchen towel embroidered with leaf motifs) adds subtle, thoughtful layers to your space.
10. Scaling Up—From Kitchen Counter to Whole‑House Greenery
Once you master the kitchen oasis, you’ll likely feel inspired to expand your indoor garden to other rooms. The same principles apply: assess light, choose appropriate containers, and maintain consistent care. Consider adding a few low‑light herbs like sage in the living room, or a small vertical garden in the hallway that doubles as a decorative partition.
For those who crave a larger harvest, a hydroponic countertop system can supply a continuous supply of herbs without soil. These systems use nutrient‑rich water and are especially useful in apartments where space is at a premium.
Conclusion—A Small Investment with Big Returns
Creating a kitchen herb oasis isn’t just about adding flavor to your meals; it’s about cultivating a living, breathing element of nature that nurtures both palate and psyche. By dedicating a modest amount of space, time, and attention, you’ll reap benefits that ripple through your cooking, your home’s atmosphere, and your overall wellbeing.
So, the next time you’re standing over a cutting board, imagine the satisfaction of snipping a fresh herb you grew yourself—right there in your kitchen. It’s a small ritual that reminds you that even in the busiest of urban lives, there’s always room for growth.

Lauren Miller is a true outdoors enthusiast who has found her passion in the trades. When she's not working hard on the job, you can find her writing, camping, fishing, and exploring all that nature has to offer. A dedicated partner to her wife Beth, Lauren loves nothing more than spending quality time together and experiencing the great outdoors side by side.
Related Posts

Turn Your Backyard into an All‑Season Social Oasis
Discover how to design a versatile backyard oasis that adapts to every season, blending modular furn... Read More
From Backyard to Boardroom: How a Garden Desk Changed My Life
A personal journey reveals how swapping a cubicle for a garden desk reshapes daily life, blending wo... Read More
From My Cubicle to a Garden Oasis: How an Outdoor Desk Redefined My Home Life
A personal journey from cramped cubicles to a garden oasis, revealing how an outdoor desk can transf... Read More
Top Posts

Turning Employment Gaps Into Strategic Career Accelerators
Discover why employment gaps aren’t career killers but opportunities to showcase growth, build portfolios, and future‑proof your professional journey....Read More

Turn Your Home Into a Low‑Stress Power Hub
A step‑by‑step guide shows how to build a simple home dashboard that tracks energy use, temperature, and wellness zones—helping you save money, reduce str...Read More

Recharging Your Body’s Bio‑Circuit: Light, Motion, and Sound for Everyday Resilience
Discover a practical framework that blends daylight exposure, micro‑movement habits, and soothing soundscapes to enhance cellular vitality, improve sleep, and...Read More

Quieting the Mind: How Sound Shapes Workplace Mental Health
The article reveals how thoughtful acoustic design, from sound‑absorbing panels to personalized noise‑cancelling tools, can transform noisy workspaces into ...Read More
0 Comments
Post Comment
You will need to Login or Register to comment on this post!