
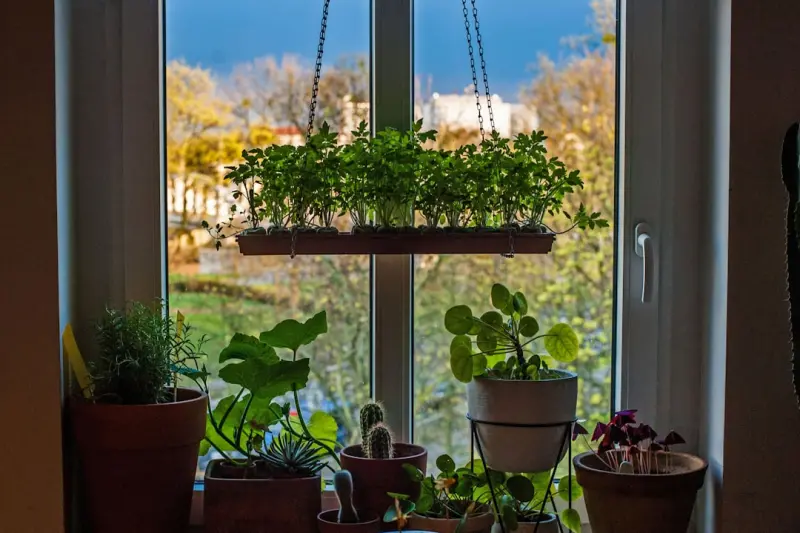
Why a Pollinator‑Friendly Backyard Is the Next Big Home Upgrade
When I first moved into my modest suburban lot, the biggest challenge I faced was convincing my partner that a “bee hotel” wasn’t a quirky Instagram stunt but a genuine ecological upgrade. Fast‑forward a few seasons, and our garden now hums with life—from lazy bumblebees to darting hummingbirds—turning a bland patch of grass into a vibrant, living showcase. If you’ve ever wondered how to replicate that buzz (literally) in your own yard, you’re in the right place. This guide walks you through the science, the design tricks, and the low‑maintenance habits that turn any backyard into a pollinator powerhouse.
Understanding the Pollinator Puzzle
Pollinators are the unsung workhorses of our food system. Over a third of the world’s crops depend on the diligent foraging of bees, butterflies, moths, and hummingbirds. Yet habitat loss, pesticide drift, and monoculture farming have pushed many native species to the brink. By carving out a sanctuary in your own backyard, you’re not just adding aesthetic value—you’re contributing to a global network that sustains biodiversity.
Beyond the ecological payoff, pollinator gardens deliver tangible perks: richer fruit and vegetable yields, natural pest control, and a sensory feast of colors, textures, and scents. Plus, there’s a unique satisfaction in watching a tiny creature you helped attract complete its life‑cycle right outside your patio.
Step 1: Assess Your Space and Set Realistic Goals
Before you sprint to the nearest nursery, take a walk around your property with a notebook. Identify:
- Sun exposure: How many hours of direct sunlight does each zone receive?
- Soil type: Sandy, clay, loam? Perform a simple squeeze test to gauge drainage.
- Existing vegetation: Are there mature trees that cast shade? Any invasive species that need removal?
- Water sources: Is there a drip line, rain barrel, or natural runoff you can tap?
Mapping these variables helps you match the right plants to the right spot, ensuring both aesthetics and pollinator appeal. Remember, a backyard pollinator haven doesn’t have to cover the entire lawn—strategically placed “hotspots” can work wonders.
Step 2: Choose Native Plants That Pack a Pollinator Punch
Native flora evolved alongside local pollinators, offering the right nectar concentrations, bloom times, and structural features. Here’s a quick starter list for most temperate zones:
- Early spring:Salvia nemorosa, Violet‑leaf goldenrod
- Mid‑season:Bee balm (Monarda didyma), Echinacea, Black-eyed Susan
- Late fall:Aster, Goldenrod, Joe‑Pye weed
Mix perennials with a few annuals to keep blooms continuous from March through November. Group plants by height and color to create layered visual interest—taller spikes at the back, medium‑height blossoms in the middle, and low‑lying groundcovers at the front.
Step 3: Provide Water, Shelter, and Nesting Sites
Flowers are just half the story. Pollinators need clean water sources, safe resting spots, and places to lay eggs.
- Water stations: A shallow dish with pebbles works for bees, while a birdbath with a gentle slope invites hummingbirds. Change the water weekly to prevent mosquito breeding.
- Bee hotels: Stacked bamboo tubes, drilled wooden blocks, or even reclaimed pallets can become nesting sanctuaries for solitary bees. Place them in sunny, wind‑protected corners.
- Butterfly shelters: Rough bark, leaf litter, and low shrubbery provide roosting spots. A small pile of twigs or a dead log can make a big difference.
These micro‑habitats don’t need elaborate construction—think of them as functional décor that adds intrigue to your garden layout.
Step 4: Adopt Sustainable Soil Practices
Healthy soil is the foundation of any thriving garden. Instead of relying on synthetic fertilizers, adopt regenerative techniques:
- Compost mulching: Spread a 2‑inch layer of well‑rotted compost around plant bases. It retains moisture, feeds microbes, and suppresses weeds.
- Cover crops: Plant low‑growth legumes in vacant spots during the off‑season. They fix nitrogen and protect soil from erosion.
- Mycorrhizal inoculants: These beneficial fungi form symbiotic relationships with plant roots, improving nutrient uptake—especially crucial for native species that often have specific mycorrhizal partners.
If you’re curious about how soil health intersects with indoor greenery, check out the indoor micro‑gardening post for a deeper dive on nutrient cycles in confined spaces.
Step 5: Integrate Water‑Harvesting Solutions
Pollinator gardens thrive on consistent moisture, especially during dry spells. Installing a simple rain‑catching system—think a rain barrel with a mesh filter—can provide a steady water supply without increasing your utility bill. For those with limited space, a tiered rain garden at the base of a retaining wall can double as an aesthetic feature and a drainage solution.
Speaking of rain‑wise design, the rooftop rain gardens article showcases how urban dwellers capture runoff for lush plantings—a principle you can adapt for any backyard slope.
Step 6: Create a Seamless Flow Between Garden Zones
Design is more than plant selection; it’s about how people move through the space. Consider these layout tips:
- Pathways: Use permeable pavers or crushed stone to allow water infiltration while guiding visitors past pollinator hotspots.
- Seating nooks: A simple bench tucked beside a blooming shrub invites observation and mindfulness.
- Lighting: Low‑intensity, warm LEDs along pathways won’t disturb nocturnal pollinators yet keep the area safe after dusk.
By weaving functional elements into the pollinator design, you create a garden that’s both lively and livable.
Step 7: Maintain Year‑Round Appeal Without Over‑Working
One myth about pollinator gardens is that they demand constant pruning and replanting. In reality, a well‑planned native garden largely self‑regulates. Here’s a low‑maintenance calendar:
| Season | Key Tasks |
|---|---|
| Spring | Remove winter debris, split perennials, add early‑bloomers. |
| Summer | Deadhead spent flowers, replenish water stations, monitor for pests. |
| Fall | Mulch heavily, plant late‑season nectar sources, clean bee hotels. |
| Winter | Leave dead stems for overwintering insects, plan next year’s additions. |
By aligning chores with natural cycles, you spend less time on upkeep and more time enjoying the garden’s bounty.
Bonus: Bringing the Buzz Inside
If your indoor space craves a touch of the outdoors, consider a few potted native herbs—like lavender or thyme—on a sunny windowsill. They double as culinary staples and mini‑nectar sources for indoor‑friendly pollinators like solitary mason bees. This tiny bridge between interior and exterior ecosystems echoes the principles explored in the indoor micro‑gardening piece, reinforcing that sustainability can be a holistic experience.
Scaling Up: From Backyard to Neighborhood
Once your garden is humming, why not spark a community movement? Host a “Pollinator Picnic” where neighbors bring dishes made from locally sourced produce, share seed swaps, or collectively plant a pollinator corridor along a street median. The ripple effect of multiple small habitats can dramatically boost regional biodiversity.
Final Thoughts: Your Backyard, Your Impact
Designing a pollinator‑friendly backyard isn’t about achieving perfection; it’s about taking purposeful steps that align your living space with nature’s rhythms. Each native seed, each bamboo tube, each rain barrel is a vote for a healthier planet. And as the hum of wings becomes the soundtrack of your evenings, you’ll realize that the most rewarding home upgrades are often the ones you can’t see—except when you watch a bee land gently on a lavender bloom and know you helped it get there.

Jimmy Anand is a content creator that gets inspired by many aspects of life, internet or whatever inspires him at that moment. When he's not online he's gaming and when he is not gaming he is online trolling discussion boards.
Related Posts

The Future‑Ready Home: Blending Tech, Sustainability, and Style
Explore a fresh approach to home living that merges technology, green practices, and design, turning... Read More
Designing a Cozy Outdoor Living Room Without Breaking the Bank
Transform your patio into a welcoming outdoor living room using affordable furniture, layered lighti... Read More
How to Grow a Backyard Micro‑Forest: A Hands‑On Blueprint
Discover a step‑by‑step guide to building a backyard micro‑forest that enhances biodiversity, ... Read More
Top Posts

Unlocking the Healing Power of Awe: How Wonder Fuels Mental Wellness
A deep dive into the science of awe reveals its power to reduce cortisol, improve heart‑rate variability, and expand perspective. Learn practical ways to invi...Read More

Turning Every Trip Into a Personal Innovation Lab
Learn to treat each journey as a lab for personal growth. From hypothesis crafting to reflective storytelling, this guide shows you how to turn travel into a po...Read More

Personalized Hydration: Turning Data into Daily Water Wisdom
Explore a data‑driven approach to hydration, using wearables and smart bottles to tailor daily water intake for improved focus, health, and longevity....Read More

AI as Your Personal Memory Curator: Turning Everyday Moments into a Living Archive
Explore how AI transforms chaotic photo and note collections into a cohesive, secure memory archive, helping you recall, reflect, and grow....Read More
0 Comments
Post Comment
You will need to Login or Register to comment on this post!