
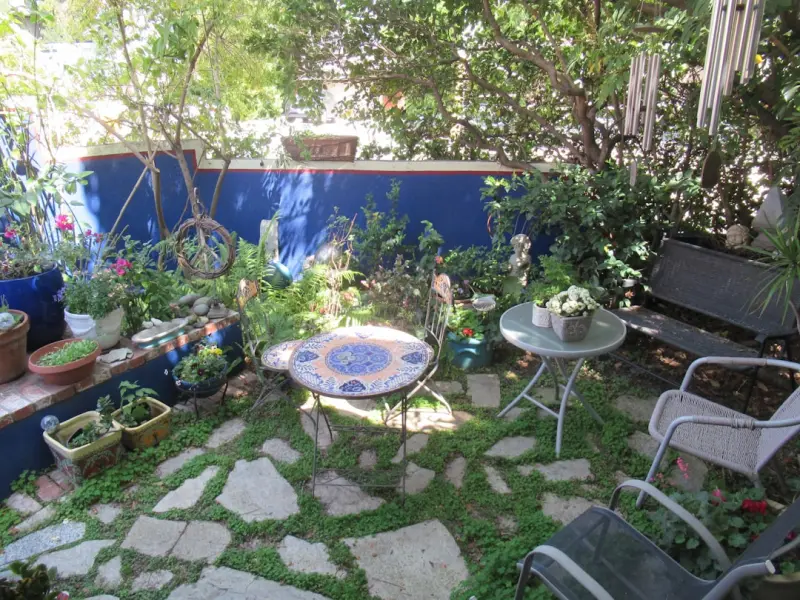
When I first moved into my downtown loft, the only green I had was a wilted cactus on the windowsill. I craved the feeling of fresh soil under my nails, the subtle perfume of basil on a lazy Sunday, and a place where I could literally step outside without leaving my living room. The challenge? A 600‑square‑foot space with a concrete slab floor and a ceiling that seemed to stare back at me with a skeptical glare. The solution, as it turned out, was less about buying new furniture and more about re‑imagining what I already owned. In this post I’m sharing my journey of turning cramped urban corners into thriving garden retreats using upcycled materials, clever layout tricks, and a dash of creativity.
Why Upcycling Beats Buying New
First, let’s address the elephant in the room: “Why not just buy a ready‑made patio set?” The answer is threefold. Cost – a quality outdoor set can easily eclipse the price of a weekend DIY project. Environmental impact – every piece of furniture that ends up in a landfill is a missed opportunity to give it a second life. And personal satisfaction – there’s an unmatched joy in sipping tea from a coffee table you salvaged from an old pallet.
Upcycling also invites you to customize each piece to match your aesthetic. Want a rustic vibe? Sand down the wood and finish it with a matte oil. Prefer a sleek, modern look? Paint the frames in bold matte black and add brass hardware. The possibilities are endless, and each choice tells a story about your values and style.
Scouting for Treasure: Where to Find Materials
Before you start sawing, you need a reliable source of raw material. Here are my favorite hunting grounds:
- Local thrift stores – You’ll often find sturdy wooden tables, metal chairs, or even broken garden benches that just need a little TLC.
- Construction site leftovers – Talk to contractors; they frequently discard pallets, lumber, or even reclaimed bricks that are perfect for DIY projects.
- Online marketplaces – Platforms like Craigslist and Facebook Marketplace are gold mines for free or cheap items that just need a creative spark.
- Friends and family – Let people know you’re on the lookout for “project pieces.” A discarded bookshelf or an old door can become a stunning garden wall or pot rack.
Pro tip: When you find a potential piece, ask yourself three questions – Is it structurally sound? Does it have the right dimensions for my space? Can I see a clear transformation pathway? If you answer “yes” to at least two, it’s a keeper.
Designing Around Light and Airflow
One of the biggest challenges in small‑space gardening is balancing natural light with airflow. Unlike a sprawling backyard, a loft often has limited window exposure and can become a heat trap. Here’s how I tackled it:
- Vertical planting – By mounting wall‑mounted planters, I freed up floor space and created a “green wall” that bounces light deeper into the room.
- Portable trellises – Lightweight wooden or metal trellises on wheels let you shift vines and climbers to capture the sun at different times of day.
- Reflective surfaces – I painted the ceiling a soft, light‑reflecting white and added a large mirror opposite the main window. This amplified natural light without adding glare.
These tactics helped me achieve a bright, airy vibe that makes even a compact balcony feel like a mini‑oasis.
Crafting the Core: Upcycled Furniture Pieces
Below is a step‑by‑step guide for three essential garden pieces that transformed my loft.
1. The Pallet Coffee Table
Materials: Two sturdy wooden pallets, sandpaper, exterior wood stain, 4 metal casters, a sheet of tempered glass.
Step 1 – Preparation: Scrub the pallets with a brush, then sand to remove splinters. Apply a weather‑resistant wood stain and let it dry for 24 hours.
Step 2 – Assembly: Stack the pallets, securing them with wood screws. Attach the casters to the bottom corners for mobility.
Step 3 – Finishing Touch: Place the tempered glass on top. The glass protects the wood from water spills while still showcasing the raw pallet aesthetic.
Result: A sturdy, mobile surface that can double as a potting bench when you need to repot succulents.
2. The Reclaimed Door Plant Shelf
Materials: An old wooden door, 4 brackets, 6 wooden planks (for shelves), drill, sandpaper, matte paint.
Step 1 – Clean & Sand: Remove any old paint or hardware, sand the surface smooth.
Step 2 – Paint: Choose a muted tone—sage green or warm gray—to blend with your indoor garden palette.
Step 3 – Install Brackets & Shelves: Mount the door horizontally on the wall, secure brackets, and insert planks as shelves. Space the shelves 12‑inch apart to accommodate various pot sizes.
Result: A rustic “doorway” that holds herbs, small potted trees, and decorative terrariums.
3. The DIY Rolling Herb Cart
Materials: A metal garden cart (often found at hardware stores), 2 wooden crates, zip ties, potting soil, herb seedlings.
Step 1 – Reinforce: Attach the crates to the cart’s frame using zip ties and metal brackets for extra stability.
Step 2 – Plant: Fill each crate with potting soil and arrange herbs according to sunlight needs—basil and thyme love the sunniest spot, while mint prefers shade.
Step 3 – Mobility: The cart’s wheels allow you to reposition the herbs for optimal light or bring them outdoors on warm days.
Result: A movable herb garden that doubles as a stylish side table when you’re entertaining guests.
Integrating Functional Beauty
Beyond aesthetics, each piece serves a purpose that streamlines daily life:
- Potting Station: The pallet coffee table doubles as a surface for mixing soil, cleaning tools, and repotting.
- Storage Solutions: The reclaimed door shelf holds gardening tools, seed packets, and decorative jars, keeping clutter at bay.
- Seasonal Flexibility: The rolling herb cart lets you chase the sun or store plants during colder months.
When you design with multifunctionality in mind, your garden becomes an extension of your living space rather than an afterthought.
Choosing Plants that Thrive Indoors
Not every plant is a good fit for a low‑light, low‑humidity loft. Here are my top picks for resilient indoor growers:
- Herbs: Basil, parsley, chives, and mint are forgiving and useful in the kitchen.
- Air‑purifying foliage: Spider plant, pothos, and ZZ plant add greenery while cleaning the air.
- Succulents & cacti: Their minimal water needs make them perfect for beginners.
- Small fruiting plants: Dwarf citrus trees and strawberries can add a splash of color and a taste of freshness.
Pair each plant with a suitable container—terracotta for herbs (helps regulate moisture), glazed ceramic for succulents (prevents excessive evaporation), and woven baskets for foliage (adds texture).
Maintenance Made Simple
One of my biggest fears was the time commitment of caring for a garden in a hectic schedule. I tackled this by establishing a 15‑minute daily routine:
- Morning check: Scan for wilted leaves, ensure soil is moist, and rotate pots for even light exposure.
- Midday water: Light mist for foliage plants; deeper watering for herbs only when the top inch of soil feels dry.
- Evening tidy: Remove dead foliage, prune overgrown stems, and clean any splashed water from furniture.
Consistency beats intensity. A small, regular habit prevents the garden from becoming a time‑sucking chore.
Linking Up with Broader Home Strategies
If you’re already experimenting with practical home hacks, you’ll find that many of those ideas translate beautifully into garden projects. For example, using tension rods to create a hanging herb system mirrors the same low‑cost, high‑impact hack you might employ in the kitchen.
Moreover, when you consider the larger picture of sustainable design strategies, upcycling your garden furniture aligns perfectly with a low‑carbon footprint lifestyle. By reusing materials, you cut down on the demand for new production, which reduces energy consumption and waste.
Personal Touches: Adding Personality to Your Green Space
Here are a few finishing flourishes that helped me make the garden truly mine:
- Hand‑painted pot labels: I used chalkboard paint on small wooden plaques to write herb names. They’re easy to update as the garden evolves.
- String lights: Warm LED strands woven through the reclaimed door shelf create a cozy ambiance for evening meals.
- Recycled glass jars: I transformed old jam jars into mini terrariums for succulents, adding a pop of color and a sense of nostalgia.
- Personalized garden journal: Though I’m not a journaling pro, I kept a simple log of planting dates, watering schedules, and growth observations. It’s surprisingly satisfying to flip back and see progress.
Overcoming Common Pitfalls
Every DIY journey has its hiccups. Below are challenges I faced and how I resolved them:
- Uneven floors: My loft’s concrete slab had a slight slope, causing water to pool under the pallet table. I placed rubber pads under the table legs to level it and prevent moisture damage.
- Pests: A sudden aphid invasion on my basil startled me. I introduced ladybugs in a small terrarium—a natural predator that quickly reclaimed the garden.
- Limited sunlight: The north‑facing window offered only indirect light. I supplemented with a low‑energy grow light on a timer, ensuring the herbs still thrived.
- Structural integrity: An old door warped after a rainy season. I reinforced it with metal corner brackets and added a protective sealant.
Celebrating the Results
Six months after my first upcycled piece, my loft now feels like a living, breathing extension of my home. The scent of fresh basil greets me each morning, guests comment on the “cozy garden vibe,” and I’ve reduced my grocery bill by roughly 15% thanks to home‑grown herbs.
More importantly, each piece tells a story of transformation—of a discarded pallet becoming a centerpiece, of a weathered door turning into a vertical garden, and of a simple cart evolving into a mobile herb sanctuary. The process reinforced a core belief: sustainability, creativity, and functionality can coexist in even the tiniest of spaces.
So, if you’re staring at a barren wall or a bare balcony and dreaming of greenery, remember that the solution might already be sitting in your garage or waiting at the next thrift store. Grab a sandpaper, a paintbrush, and a dash of curiosity. Your indoor garden—and the joy it brings—awaits.

Amanda is a passionate writer exploring a kaleidoscope of topics from lifestyle to travel and everything in between.
Related Posts

Bringing the Wild Inside: How to Design a Biophilic Home That Feeds the Soul
A guide to transforming any space into a nature‑infused sanctuary, covering light, greenery, tacti... Read More
Garden Whisper: Designing a Year‑Round Outdoor Reading Nook
Learn to create a peaceful outdoor reading nook using reclaimed furniture, seasonal plants, and ecoâ... Read More
Why My Garden Desk Became the Heartbeat of Home Living
A garden desk turned my backyard into a vibrant hub, merging work, family, and nature. Learn the ben... Read More
Top Posts

Backyard Biodiversity: A Practical Guide to Creating a Thriving Wildlife Habitat
Learn to transform your garden into a thriving wildlife haven using native plants, simple water features, and eco‑friendly practices that attract pollinators ...Read More

Turn Your Hallways into Power Zones: Simple Home Hacks for Energy and Focus
Learn to upgrade your hallway with layered lighting, smart storage, sound management, and micro‑rituals, turning this often‑ignored space into a powerful ca...Read More

Strategic Visibility: How to Get Noticed at Work Without Feeling Fake
Discover the art of strategic visibility—real, authentic ways to get noticed at work, build influence, and accelerate your career without feeling like a bragg...Read More
Creating a Multi‑Sensory Garden That Nurtures Body and Mind
Learn to craft a sensory garden that delights all five senses, using fragrance, texture, sound, taste, and light to turn any backyard into a healing sanctuary....Read More
0 Comments
Post Comment
You will need to Login or Register to comment on this post!