
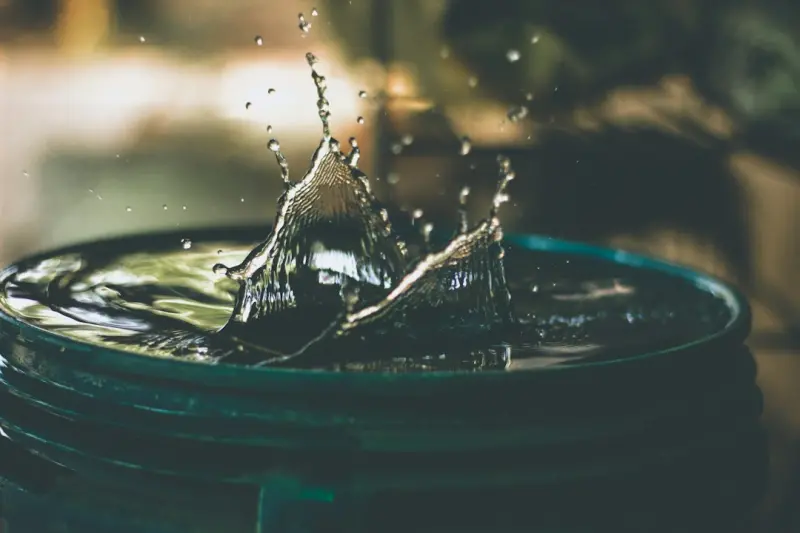
When I first moved into my modest bungalow, the garden in the back was a patchwork of wilted flower beds, a leaky hose, and a persistent puddle that seemed to mock my attempts at being eco‑friendly. I was determined to turn that sorry scene into a showcase of responsible water stewardship, and the journey taught me that managing water at home is as much about mindset as it is about hardware. In this post, I’m sharing the step‑by‑step roadmap I followed, the pitfalls I tripped over, and the simple technologies that turned a drippy yard into a resilient, low‑maintenance oasis.
Why Water Management Matters (Even If You Don’t Live in a Drought Zone)
Most homeowners think of water conservation as a “big‑picture” issue—something for farmers, municipalities, or the ultra‑green. The truth is, the average house uses roughly 300 gallons of water per day, and a staggering 30‑40% of that is outdoors: watering lawns, washing cars, and flushing the occasional garden hose. By capturing even a fraction of that runoff, you can:
- Cut your utility bill by 10‑20%.
- Reduce pressure on local stormwater systems.
- Create a buffer against unexpected watering restrictions.
- Boost the health of native plants that thrive on consistent, gentle moisture.
It’s not just an environmental win; it’s a financial and aesthetic win, too.
Rain Barrels 101: The Core of Any Home Water‑Saving System
Think of a rain barrel as a low‑tech battery for water. When the sky opens, the barrel stores that energy; when the ground is thirsty, you draw from it. The concept is ancient, but modern materials and smart accessories make it easier than ever.
Choosing the Right Barrel
Here are the three criteria I used when I started shopping:
- Capacity. A 55‑gallon drum is a sweet spot for most suburban roofs—it fits in a standard two‑car garage, yet provides enough water for a week of average garden use.
- Material. Food‑grade polyethylene barrels resist UV degradation and don’t leach chemicals. If you prefer a rustic look, a reclaimed wooden cask works, but be sure to line it with a waterproof liner.
- Accessibility. Look for a barrel with a wide mouth and a sturdy spigot at waist height. A built‑in screen prevents debris and insects from contaminating the water.
Location, Location, Location
The ideal spot is directly under a downspout, on a level surface, and close to where you’ll use the water (e.g., garden beds, irrigation system, or outdoor faucet). I built a simple raised platform using reclaimed pallets, which not only lifted the barrel for easier tapping but also created a charming visual element. If you have a sloped yard, consider stacking two barrels with a sturdy frame—just remember to reinforce the base.
Installation Basics
- Redirect a Downspout. Cut the existing downspout a few inches above the barrel, insert a diverter kit, and secure it with PVC cement. The diverter channels rainwater into the barrel while allowing excess flow to bypass when the barrel is full.
- Seal the System. Apply silicone sealant around the spigot and any pipe connections. A tight seal prevents leaks and keeps pests out.
- Add a Float Valve. If you want to automate overflow, a simple float valve shuts off water when the barrel reaches a preset level, diverting it safely to a drainage area or secondary barrel.
Greywater Recycling: Turning Everyday Use Into Garden Gold
While rain barrels capture nature’s bounty, greywater systems harvest what we already use indoors. Sources include shower runoff, washing machine discharge (excluding bleach or fabric softener), and sink water from kitchens (if you’re diligent about avoiding oils). Reusing this water reduces demand on fresh water and cuts your sewer bill.
Simple DIY Greywater Setup
My first greywater experiment was a batch system—collecting water in a large bucket and manually distributing it with a watering can. After a few weeks, I upgraded to a gravity‑fed drip line that runs from my washing machine’s discharge hose to a set of mulch beds.
- Step 1: Install a Diverter Valve. Replace the washing machine’s drain hose with a Y‑shaped PVC fitting. One branch goes to the sewer (as required by code), the other to a 200‑liter underground reservoir.
- Step 2: Filter the Water. A simple sand and charcoal filter removes lint and residual soap, making the water safe for non‑edible plants.
- Step 3: Distribute via Drip. Connect a low‑pressure drip line that weaves through your flower beds. The slow, steady flow mimics natural rainfall and minimizes runoff.
Always check local regulations—some municipalities require permits for greywater reuse.
Legal Landscape: Staying on the Right Side of the Law
Water rights can be a maze. In many regions, collecting rainwater is legal, but you may need a permit if your system exceeds a certain capacity. Greywater, on the other hand, often has stricter guidelines. A quick call to your city’s environmental health department can save you headaches later. When I first inquired, the official told me:
“As long as the system doesn’t contaminate the potable water supply and the water is used for irrigation, it’s permissible.”
That’s why I installed a backflow preventer on the main supply line—an inexpensive safeguard that also reassures neighbors.
Seasonal Maintenance: Keeping the System Flowing Year‑Round
Rain barrels and greywater tanks need a bit of love, especially as temperatures swing.
- Winterizing. Drain the barrel before the first frost, or add an insulated cover. For greywater, empty the reservoir and store the filter media indoors.
- Spring Clean‑out. Scrub the interior with a mild bleach solution (1 tablespoon per gallon) to prevent algae. Rinse thoroughly before refilling.
- Mid‑Season Checks. Inspect the diverter valve for debris, tighten loose fittings, and test the spigot for proper flow.
These tasks take less than an hour a month, but they prevent costly leaks and keep water quality high.
Designing with Aesthetics: Making Water Features Look Good
Let’s be honest: a hulking plastic drum can feel out of place next to a manicured lawn. I tackled this by turning the barrel into a garden sculpture. I painted it in a muted sage, added a reclaimed wooden lid, and surrounded it with cascading succulents that love the occasional splash of extra moisture. The result was a functional art piece that neighbors asked about.
If you’re short on space, consider a Vertical Oasis style arrangement—stacking small barrels on a trellis and using the overflow to water a vertical herb garden. It’s a space‑saving win that turns a balcony into a mini‑farm.
Integrating Smart Tech: From Manual to Automated
Automation doesn’t have to be pricey. A basic water‑level sensor paired with a Wi‑Fi‑enabled valve lets you monitor your barrel’s fill level from your phone. I linked this sensor to the same hub I use for my Low‑Cost Smart Energy Hub, creating a dashboard that shows both water and electricity usage side‑by‑side. When the barrel hits 80% capacity, a notification pops up, reminding me to check the overflow valve.
For those who love soundscapes, consider a small solar‑powered water feature that runs off the barrel’s overflow. Not only does it add a gentle auditory backdrop, but it also ties back to the ideas in Sound‑Smart Living—using ambient sound to enhance home tranquility.
Community Impact: Sharing the Harvest
One of the most rewarding aspects of my water‑saving journey was the ripple effect it had on my neighborhood. After I installed a second, larger barrel, the kids on the street started stopping by to learn how it works. I ended up organizing a “Water‑Wise Weekend” where neighbors shared seedlings, swapped rain‑gathering tips, and even set up a shared drip‑line that served the communal garden plot.
These small collaborations foster a sense of stewardship that goes beyond any single household. When you reduce your own water footprint, you inspire others to think about their consumption, creating a collective impact that can’t be measured in gallons alone.
Putting It All Together: My 12‑Month Timeline
Below is the timeline I followed, which you can adapt to your own climate and schedule.
| Month | Milestone |
|---|---|
| January | Research local regulations; order barrels and basic fittings. |
| February | Prepare site: level ground, build pallet platform, paint barrels. |
| March | Install downspout diverter; test for leaks. |
| April | Launch first rain capture; monitor fill levels. |
| May | Set up greywater batch system; start using washing‑machine water for garden beds. |
| June | Integrate water‑level sensor with smart hub. |
| July | Host neighborhood water‑wise workshop; share seedlings. |
| August | Fine‑tune drip irrigation; add mulch to improve moisture retention. |
| September | Begin winterizing process; add insulated barrel covers. |
| October | Empty and clean all tanks; store filters. |
| November | Plan next‑year upgrades; research solar pump options. |
| December | Reflect on savings; write a post (like this one) to inspire others. |
Final Thoughts: Water as a Design Element, Not Just a Utility
When you reframe water from a mere utility to a design element, the possibilities expand dramatically. Your backyard becomes a living, breathing system that rewards patience, nurtures biodiversity, and saves you money. The journey starts with a single barrel, a little elbow grease, and the willingness to ask “what if?”—and before you know it, the gentle patter of rain on a metal drum is the soundtrack to a greener, more resilient home.

Ryan Stuart is a seasoned freelance features writer, editor, and professional photographer with a passion for exploring the world and capturing its beauty through words and images.
Related Posts
Cultivating Curiosity: Turning Your Backyard into a Living Laboratory
Learn to treat your backyard like a living laboratory—track data, embrace sensory planting, and sh... Read More
From Backyard to Boardroom: How My Garden Desk Supercharged Home Life
A personal journey reveals how moving a desk outdoors sparked creativity, improved well‑being, and... Read More
Garden Desk Magic: Transforming Home Life, Work, and Wellness
A garden desk isn’t just a workspace; it’s a sanctuary where home life, work, and wellness conve... Read More
Top Posts

The Low‑Tech Revamp: Turning Every Room into a Calm, Productive Oasis
This guide shows how simple, low‑tech tweaks—like optimizing natural light, creating no‑screen zones, and adding tactile comforts—can transform any home...Read More

When AI Becomes the Boardroom’s Silent Strategist
AI is quietly reshaping the boardroom, offering real‑time risk detection, massive scenario simulations, and narrative‑driven insights that empower executive...Read More
Houseplant Haven: Curating a Living Green Space for Health, Mood, and Productivity
Learn practical steps to build a thriving indoor garden, from selecting low‑maintenance plants to smart watering, lighting, and styling ideas that enhance hea...Read More

Storytelling as Therapy: Rewriting Your Inner Narrative
Explore how turning everyday experiences into personal stories can transform stress into growth, using simple writing, speaking, and digital sharing practices....Read More
0 Comments
Post Comment
You will need to Login or Register to comment on this post!