
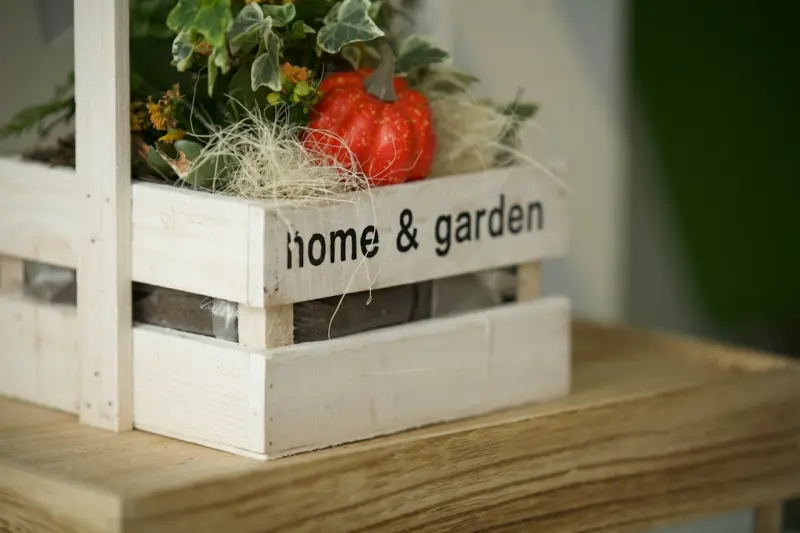
Ever walked into a room and felt the space whisper, “there’s more here than meets the eye”? I’ve spent the better part of a decade coaxing reluctant corners, neglected balconies, and even drab stairwells into lush, living extensions of my home. The magic isn’t in pricey renovations or exotic plant collections; it’s in a mindset shift—seeing every square foot as a canvas for green, edible, or simply soothing experiences. Below, I’ll walk you through my step‑by‑step alchemy for turning everyday spaces into vibrant garden retreats that feed the senses, the stomach, and the soul.
1. The Power of the Unused Nook
Before you buy a fancy trellis or a high‑tech irrigation system, take inventory of the “dead zones” in your home. These are the spots that rarely get a second glance: the space behind the kitchen door, the void under a staircase, the narrow hallway between the living room and the pantry. In my own apartment, the narrow hallway that led to the laundry room felt like a hallway to nowhere. I turned it into a vertical herb garden that not only smells amazing but also supplies fresh basil, mint, and thyme for my weekday meals.
- Measure twice, plant once. Grab a tape measure, note the height, width, and any obstructions (outlets, vents, windows).
- Choose a purpose. Do you want fresh produce? Aromatic herbs? A visual break?
- Pick a mounting method. For narrow walls, consider hanging pocket planters, magnetic containers, or modular wall‑grid systems that can be re‑configured as your garden evolves.
By treating these nooks as intentional garden zones, you instantly add functional square footage without expanding your floor plan.
2. Vertical Garden Hacks for Small Spaces
Vertical gardening is the ultimate space‑saver, and it’s more accessible than you think. Here are my favorite low‑budget hacks that work in apartments, townhouses, or even rental units where you can’t drill into walls:
- Hanging Shoe Organizer. Repurpose a fabric shoe rack as a plant holder. Each pocket becomes a mini‑pot, perfect for succulents, pothos, or small herbs. The fabric breathes, keeping roots happy, and you can easily remove the organizer when you move.
- PVC Pipe Stack. Cut PVC pipe into 12‑inch sections, drill drainage holes, and stack them in a tiered arrangement. Paint them a bright hue for a pop of color, and fill each with soil and your favorite trailing vines like String of Pearls or Hoya.
- Repurposed Pallet Wall. Secure a reclaimed wooden pallet to a freestanding frame (no wall attachment needed). Add a landscape fabric liner and fill the gaps with potting mix. Plant a mix of herbs, lettuce, and strawberries for a mini‑farm that you can move around.
These DIY solutions keep the installation non‑permanent, a crucial factor if you’re renting. Plus, they add a playful, kinetic element to your décor—plants that grow upward, not outward.
3. Seasonal Edible Borders: A Garden That Grows With You
One of my favorite ways to stay connected to the cycles of nature is to design seasonal edible borders. Instead of static flower beds, I layer the garden with crops that peak at different times, ensuring there’s always something ready to harvest.
Here’s a quick calendar for a temperate climate garden:
- Spring: Plant radishes, peas, and arugula. These fast‑growers can be harvested in 4‑6 weeks.
- Summer: Follow with tomatoes, basil, and peppers. Use companion planting—basil repels pests that love tomatoes.
- Fall: Switch to kale, Brussels sprouts, and carrots. They thrive in cooler temperatures and can be harvested well into winter.
- Winter: In milder regions, grow leafy greens under a cold frame or hoop house. If you’re in a harsher zone, consider a small indoor grow shelf with LED lights.
By planning in this layered manner, you turn a single patch of soil into a dynamic, year‑round pantry. The visual interest is a bonus—vibrant greens give way to deep reds and purples, creating a living tapestry that changes with the seasons.
4. DIY Rainwater Harvest Integration (Without a Xeriscape)
While xeriscaping emphasizes minimal water use, most gardeners crave lush, thriving plants that enjoy a generous watering schedule. You can still be water‑wise without sacrificing abundance by installing a simple rainwater capture system. Here’s a no‑perm, renter‑friendly approach:
- Choose a collection container. A 55‑gallon food‑grade barrel works well. Place it on a sturdy pallet to keep it off the ground.
- Attach a diverter. Use a simple “rain barrel diverter” that connects to your downspout, directing water into the barrel while allowing excess to flow away.
- Install a basic filter. A fine‑mesh screen over the barrel’s opening keeps leaves and debris out.
- Use a gravity‑fed drip system. Run a hose from the barrel’s spigot, attach a drip emitter, and let gravity do the work. Place the emitter near the base of your vegetable beds or potted plants.
This set‑up provides a steady supply of soft, mineral‑rich water that many plants love. It also reduces your municipal water bill and gives you a tangible connection to the weather—rain becomes a resource, not a nuisance.
5. Attracting Pollinators: A Garden That Works for You
If you’ve ever watched a bee hover over a lavender sprig, you know that pollinators are the unsung heroes of any thriving garden. Designing a pollinator pathway ensures that beneficial insects move through your space, improving fruit set and reducing the need for chemical pest control.
Key steps:
- Plant a diversity of native blooms. Include early‑season flowers like Echinacea and Coreopsis, mid‑season options such as lavender and sage, and late‑season asters. Variety keeps pollinators visiting from spring through fall.
- Provide shelter. Install a small bee house or leave a pile of brush and logs in a quiet corner. Butterflies love sunny, wind‑protected spots, so a shallow, sunny rock works wonders.
- Avoid pesticides. Opt for organic, neem‑based sprays only when absolutely necessary, and apply them in the early morning when pollinators are less active.
Not only will your garden look more vibrant, but you’ll also see an uptick in fruit yields and a reduction in pest pressure—nature’s own integrated pest management system.
6. Sensory Layers: From Sight to Sound (Without Over‑Engineering Acoustics)
While I love the idea of perfect sound control (and you can read more about mastering home acoustics here), you don’t need a studio‑grade setup to create a soothing garden ambience. Simple sensory layering adds depth:
- Visual texture. Mix foliage with different leaf shapes—feathery ferns, glossy hostas, and spiky yucca.
- Fragrance. Plant aromatic herbs (rosemary, thyme) alongside scented flowers (gardenias, sweet peas).
- Touch. Incorporate tactile elements like smooth river stones, soft moss, or a weathered wooden bench.
- Gentle sound. Install a small solar‑powered water feature—a pebble cascade or a hummingbird bath—providing a soft, soothing backdrop.
These layers make the garden a multi‑sensory sanctuary, encouraging you to linger, breathe, and reset.
7. Light‑Smart Enhancements Without Overcomplicating
Many readers are fascinated by the idea of programmable lighting (see my notes on Light‑Smart Design for a deep dive). For a garden retreat, you can keep it simple yet effective:
- Solar path lights. Line the perimeter of your garden with low‑profile LED stakes. They charge by day and glow warmly at dusk.
- String lights with dimmers. Drape warm‑white bulbs over a pergola or across a fence. Use a plug‑in dimmer to adjust the mood from bright dinner lighting to intimate twilight.
- Moon‑phase lanterns. Place lanterns that mimic moonlight—soft, cool tones that highlight foliage without startling insects.
These lighting tricks add drama after dark while staying energy‑efficient and easy to install.
8. The Final Alchemy: Making It Yours
Every garden, no matter how small, is a reflection of the person tending it. The real magic happens when you blend practicality with personal flair—whether that’s a quirky repurposed teacup as a succulent pot, a painted garden sign that reads “Harvest Happy,” or a handwritten plant label system that tracks growth progress.
Take a moment to walk through your newly transformed space. Notice the scent of mint as you pass the vertical herb rack. Hear the gentle trickle of water from the rain‑fed drip line. Spot a honeybee flitting from lavender to sage. Feel the cool stone of the garden bench under your fingertips. This is the culmination of thoughtful design, humble DIY, and a dash of garden alchemy.
Now, go ahead—pick a corner, gather a few containers, and start the transformation. Your home has been waiting for this burst of green, and you have the tools to make it happen today.

Jody Henderson is a passionate freelance writer, driven by a love for storytelling and a keen eye for detail. With a versatile skillset, she crafts compelling content across a variety of niches, from engaging blog posts to informative articles and persuasive marketing copy.
Related Posts

Reclaiming the Front Porch: A Year‑Round Sanctuary for Mind, Body, and Community
Discover how to turn an underused front porch into a flexible, year‑round sanctuary that enhances ... Read More

The Rise of Pocket Gardens: Big Green Impact in Small Spaces
Pocket gardens turn even the tiniest corners of urban homes into productive, sustainable oases. Lear... Read More

Transform Your Backyard with a DIY Outdoor Kitchen
A practical guide to building a backyard outdoor kitchen, from layout planning and durable materials... Read More
Top Posts
Smart, Stylish, and Sustainable: 12 Little Home Tweaks That Make Big Differences
A practical guide to 12 easy, sustainable home adjustments—from smart lighting to micro‑gardens—that transform everyday spaces into functional, calming sa...Read More

Reverse Mentoring: Turning Generational Gaps into Growth Engines
Reverse mentoring flips traditional mentorship, pairing younger talent with senior leaders to share digital fluency, fresh perspectives, and industry wisdom—c...Read More

Turning Inbox Overload into a Mindful Flow: A New Approach to Workplace Mental Health
Learn a four‑phase “Mindful Inbox” method that turns email overload into a structured, stress‑free routine, boosting mental health and workplace perform...Read More

Sleep in the Stream: Reclaiming Rest in a Binge‑Watching Culture
A deep dive into how constant streaming and screen exposure sabotage sleep, and actionable tips to restore restful nights without ditching your favorite shows....Read More
0 Comments
Post Comment
You will need to Login or Register to comment on this post!